Imagine this: You’re standing in the airport, scrolling frantically. Your boarding pass is somewhere in your email. The hotel confirmation might be in your notes app. Your itinerary? Probably in that Google doc you shared weeks ago and now can’t find.
Planning the trip wasn’t the problem. You did the research, booked the flights, saved all the right links. The problem is that everything lives in a different place. That’s why even well-planned trips can feel chaotic.
In this guide, you’ll learn how to plan an entire trip using a simple trip planning calendar that keeps everything streamlined from the moment you book to the moment you land.
Why Most Trip Planning Feels Disorganized
Most trip planning advice tells you to use more tools like downloading a travel app, printing your itinerary, or even hiring a travel planner to organize everything for you. It sounds helpful at first, but it quickly turns into a scattered system. Before long, your trip lives across five different places, and you’re constantly switching between them just to find what you need.
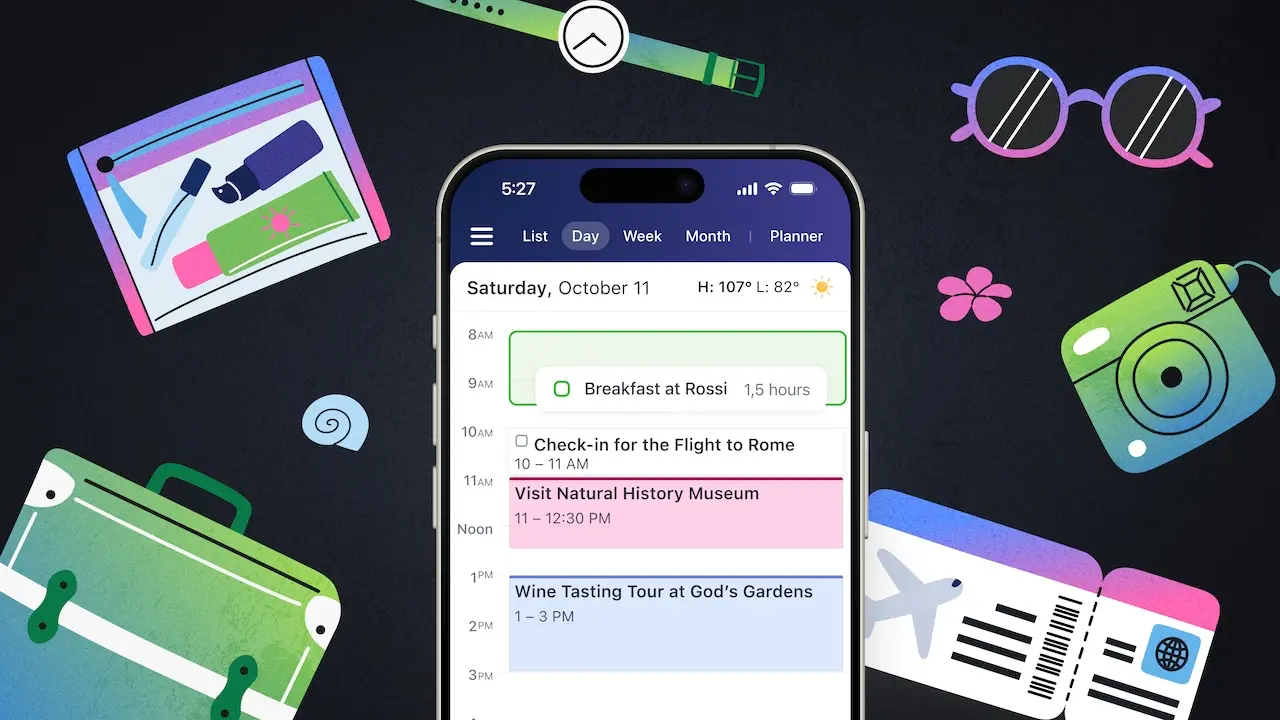
A trip planning calendar brings everything into one place. Your flights and hotel bookings become calendar events. Your activities and reservations are scheduled into your day. Your confirmations, tickets, and links are attached directly to each event.
Because everything is organized by time, it’s easier to find and easier to follow. And since it’s all in a tool you already use daily, there’s nothing new to manage.
How to Create a Trip Planning Calendar
Step 1: Create a New Calendar
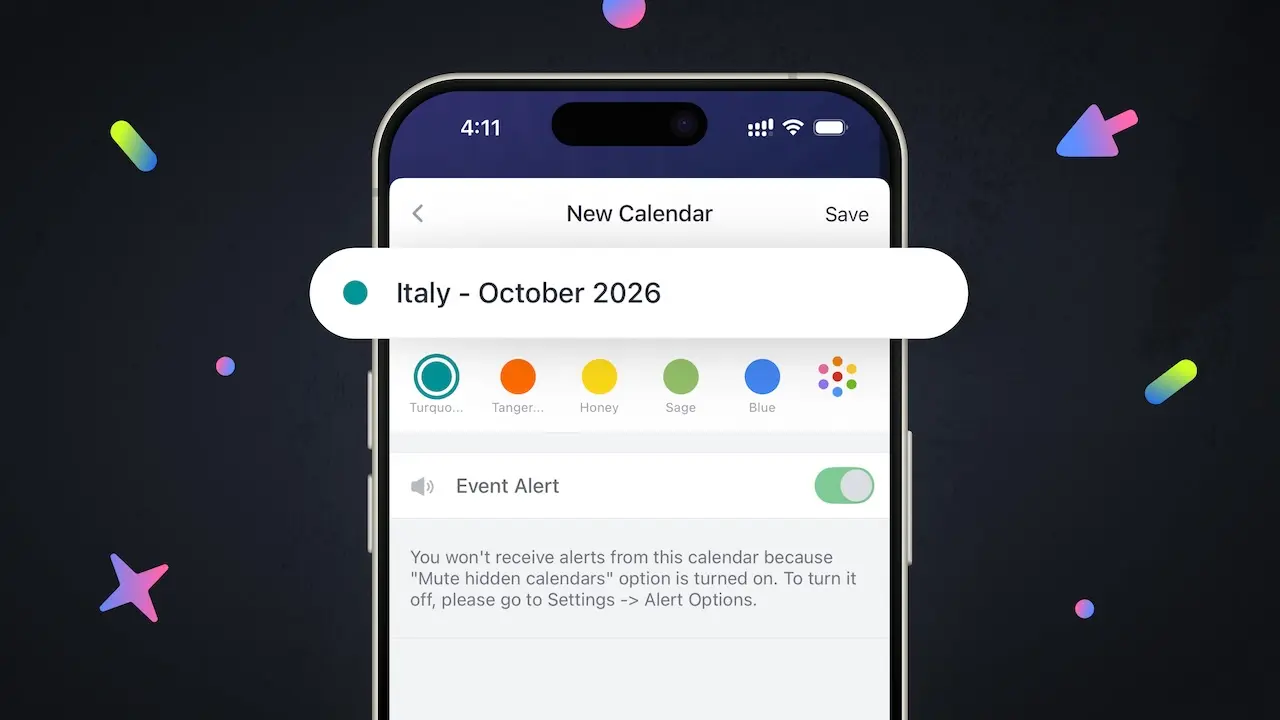
Start by creating a new calendar specifically for your trip and naming it after your destination (For example: Italy — October 2026). This simple step is the foundation of your entire planning system.
Instead of mixing travel plans with your daily meetings, errands, and reminders, you’re creating a dedicated space just for your trip. That separation immediately reduces clutter and makes your itinerary easier to see at a glance.
Expert tip: In Calendars by Readdle, you can create a new calendar by tapping the menu icon in the app. Scroll down and select Edit Calendars, then tap + Add Calendar.
From there, you can name your calendar (for example, your destination and dates), choose a color, and optionally add a description, set a location, and adjust the time zone.
Step 2: Turn Your Trip Ideas Into a Plan
Most trips start with a few simple questions, but those ideas often stay scattered. In Calendars by Readdle, you can bring everything into one place by starting with the Planner.
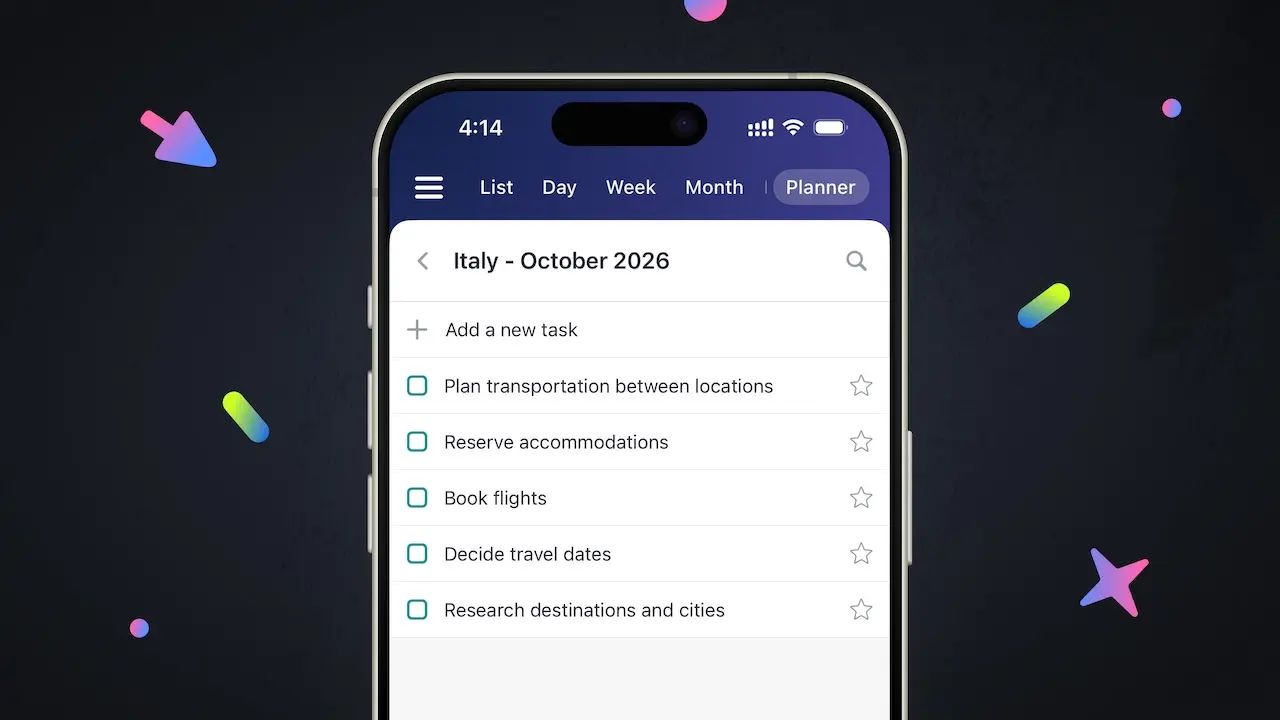
Create a to-do list and name it the same as your trip calendar (e.g. Italy — October 2026). Then use it to capture everything you need to plan your trip.
Start by adding tasks like:
- Research destinations and cities
- Decide travel dates
- Book flights
- Reserve accommodations
- Plan transportation between locations
- Look up restaurants and cafés
- Save attractions, tours, and experiences
- Check travel requirements (passport, visa, etc.)
- Create a packing list
- Set a budget or track expenses
Expert tip: In the Calendars app, you can start dragging and dropping the most important tasks directly into your calendar to schedule when you’d like to work on them as you prepare for your trip. This way, your trip planning starts as a simple list and gradually becomes a fully built-out itinerary, all in one place.
Step 3: Block Your Travel Dates
Now it’s time to define your trip clearly. Add your departure and return dates as all-day events or timed blocks in your calendar. This creates a visual boundary for your trip and helps you see exactly how much time you have.
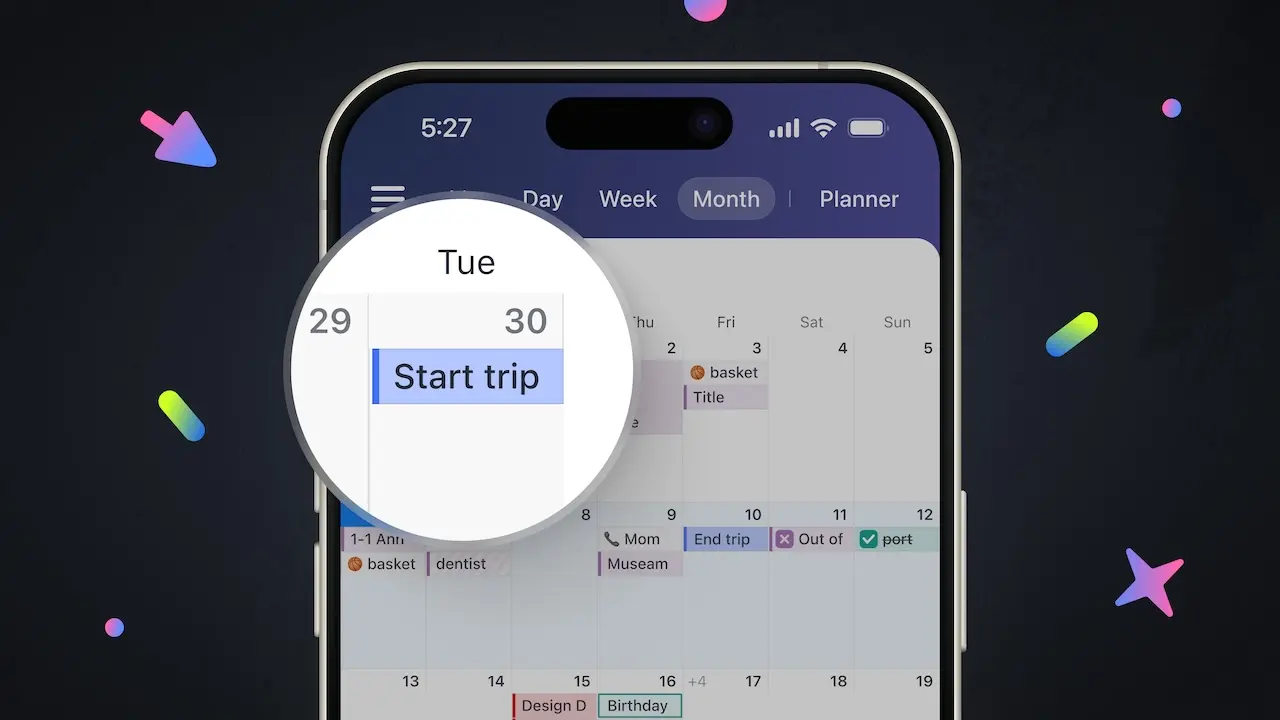
From here, you can begin shaping each day, whether that means leaving space to explore or starting to outline a rough itinerary. Having your dates clearly blocked also makes it easier to coordinate time off, plan around other commitments, and avoid overbooking your schedule.
Step 4: Add Flights and Accommodation
Next, add your fixed plans aka the details that won’t change. Create calendar events for:
- Flights (including departure and arrival times)
- Hotel check-in and check-out
- Transportation between locations
Make sure each event includes key details like confirmation numbers, addresses, and timing. This step anchors your trip. Once these are in place, everything else can be planned around them. Instead of searching your inbox for confirmations later, you’ll know exactly where to find them.
Step 5: Plan Activities
With your structure in place, you can start filling in what you’ll actually do each day. Begin adding specific activities directly into your calendar as events, even if the timing is flexible at first.
This can include things like:
- Dinner reservations at specific restaurants you want to try
- Museum visits or landmark tours
- Booked experiences or guided tours
- Day trips between cities or neighborhoods
- Activities with set availability (like wine tastings, shows, or classes)
Add them as calendar events on the day you plan to do them. If you don’t have exact times yet, you can still place them on the right day as “all-day” or flexible events.You can update each event as your plans become more finalized.
Step 6: Attach Everything to Your Calendar
At this stage, your calendar shifts from being just a schedule to becoming your full trip hub. Go through each key event in your calendar and attach all relevant details directly to it.
For example:
- Add your boarding pass or flight confirmation to your flight event
- Attach hotel confirmations (including address and check-in details) to your accommodation events
- Save reservation links, tickets, or booking confirmations inside activity events
- Include important notes like meeting points, times, or contact information directly in the event details
This keeps everything tied to the exact moment you’ll need it. Once this is done, every detail is already connected to the right place in your schedule. When your flight is scheduled, your ticket is attached. When you check in, your hotel details are there. When you head to an activity, the reservation is already linked.
Step 7: Colour Code Events
Use colour-coding to organize your calendar and make different parts of your trip easier to scan at a glance. Assign a specific colour to each type of plan so you can quickly understand your itinerary without reading every detail. For example, use one colour for travel (flights and transportation), another for accommodation, another for activities and tours, another for food and reservations, and a separate colour for free time or downtime.
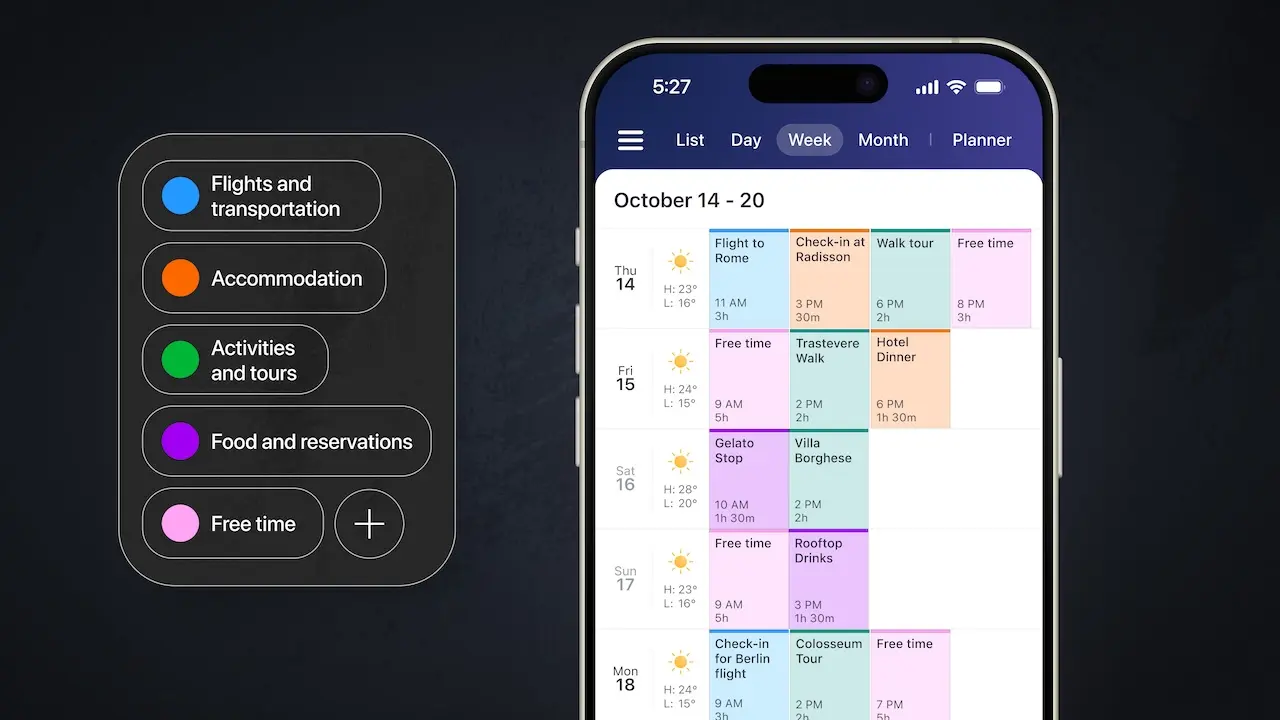
Once everything is colour-coded, your calendar becomes much easier to read, especially when you’re on the go. Instead of opening each event to see what it is, you can instantly recognize how your trip is structured just by looking at the colours. This small step adds clarity to your entire itinerary and makes your trip feel more organized and easier to navigate in real time.
Step 8: Share Your Trip
If you’re traveling with other people, share your calendar so everyone has access to the same information in one place. Once shared, any updates you make (new plans, changes, or confirmations) will automatically stay in sync for everyone.
This means no back-and-forth messages, no missed updates, and no confusion about what’s happening when. Everyone is working from the same itinerary, updated in real time.
Download Calendars by Readdle to start planning your next trip in one place.