
5 hidden features of the Control Center on your iPhone or iPad
Our iPhones and iPads are our daily assistants for completing various tasks. While we are familiar with apps and features that we rely on regularly, some hidden gems can be overlooked. We’d like to share some of the features of Contol Center that could be adopted right away.
Control Center on your iPhone or iPad has long been one of the best features of iOS, giving you one-tap access to shortcuts for actions you often have to do repeatedly in the same manner. This includes enabling or disabling the Wi-Fi and Cellular Data, turning the Airplane Mode ON or OFF, raising or lowering the Volume or Display Brightness, etc. However, Control Center is capable of a lot more things and here, we’ve prepared a handy list of 5 hidden features of Control Center so that you can fully utilize its power .
In order to use any of the features listed below, you have to enable them in Control Center by customizing how Control Center is arranged. To do this, follow these steps.
How to customize Control Center on iOS
- Launch the Settings app.
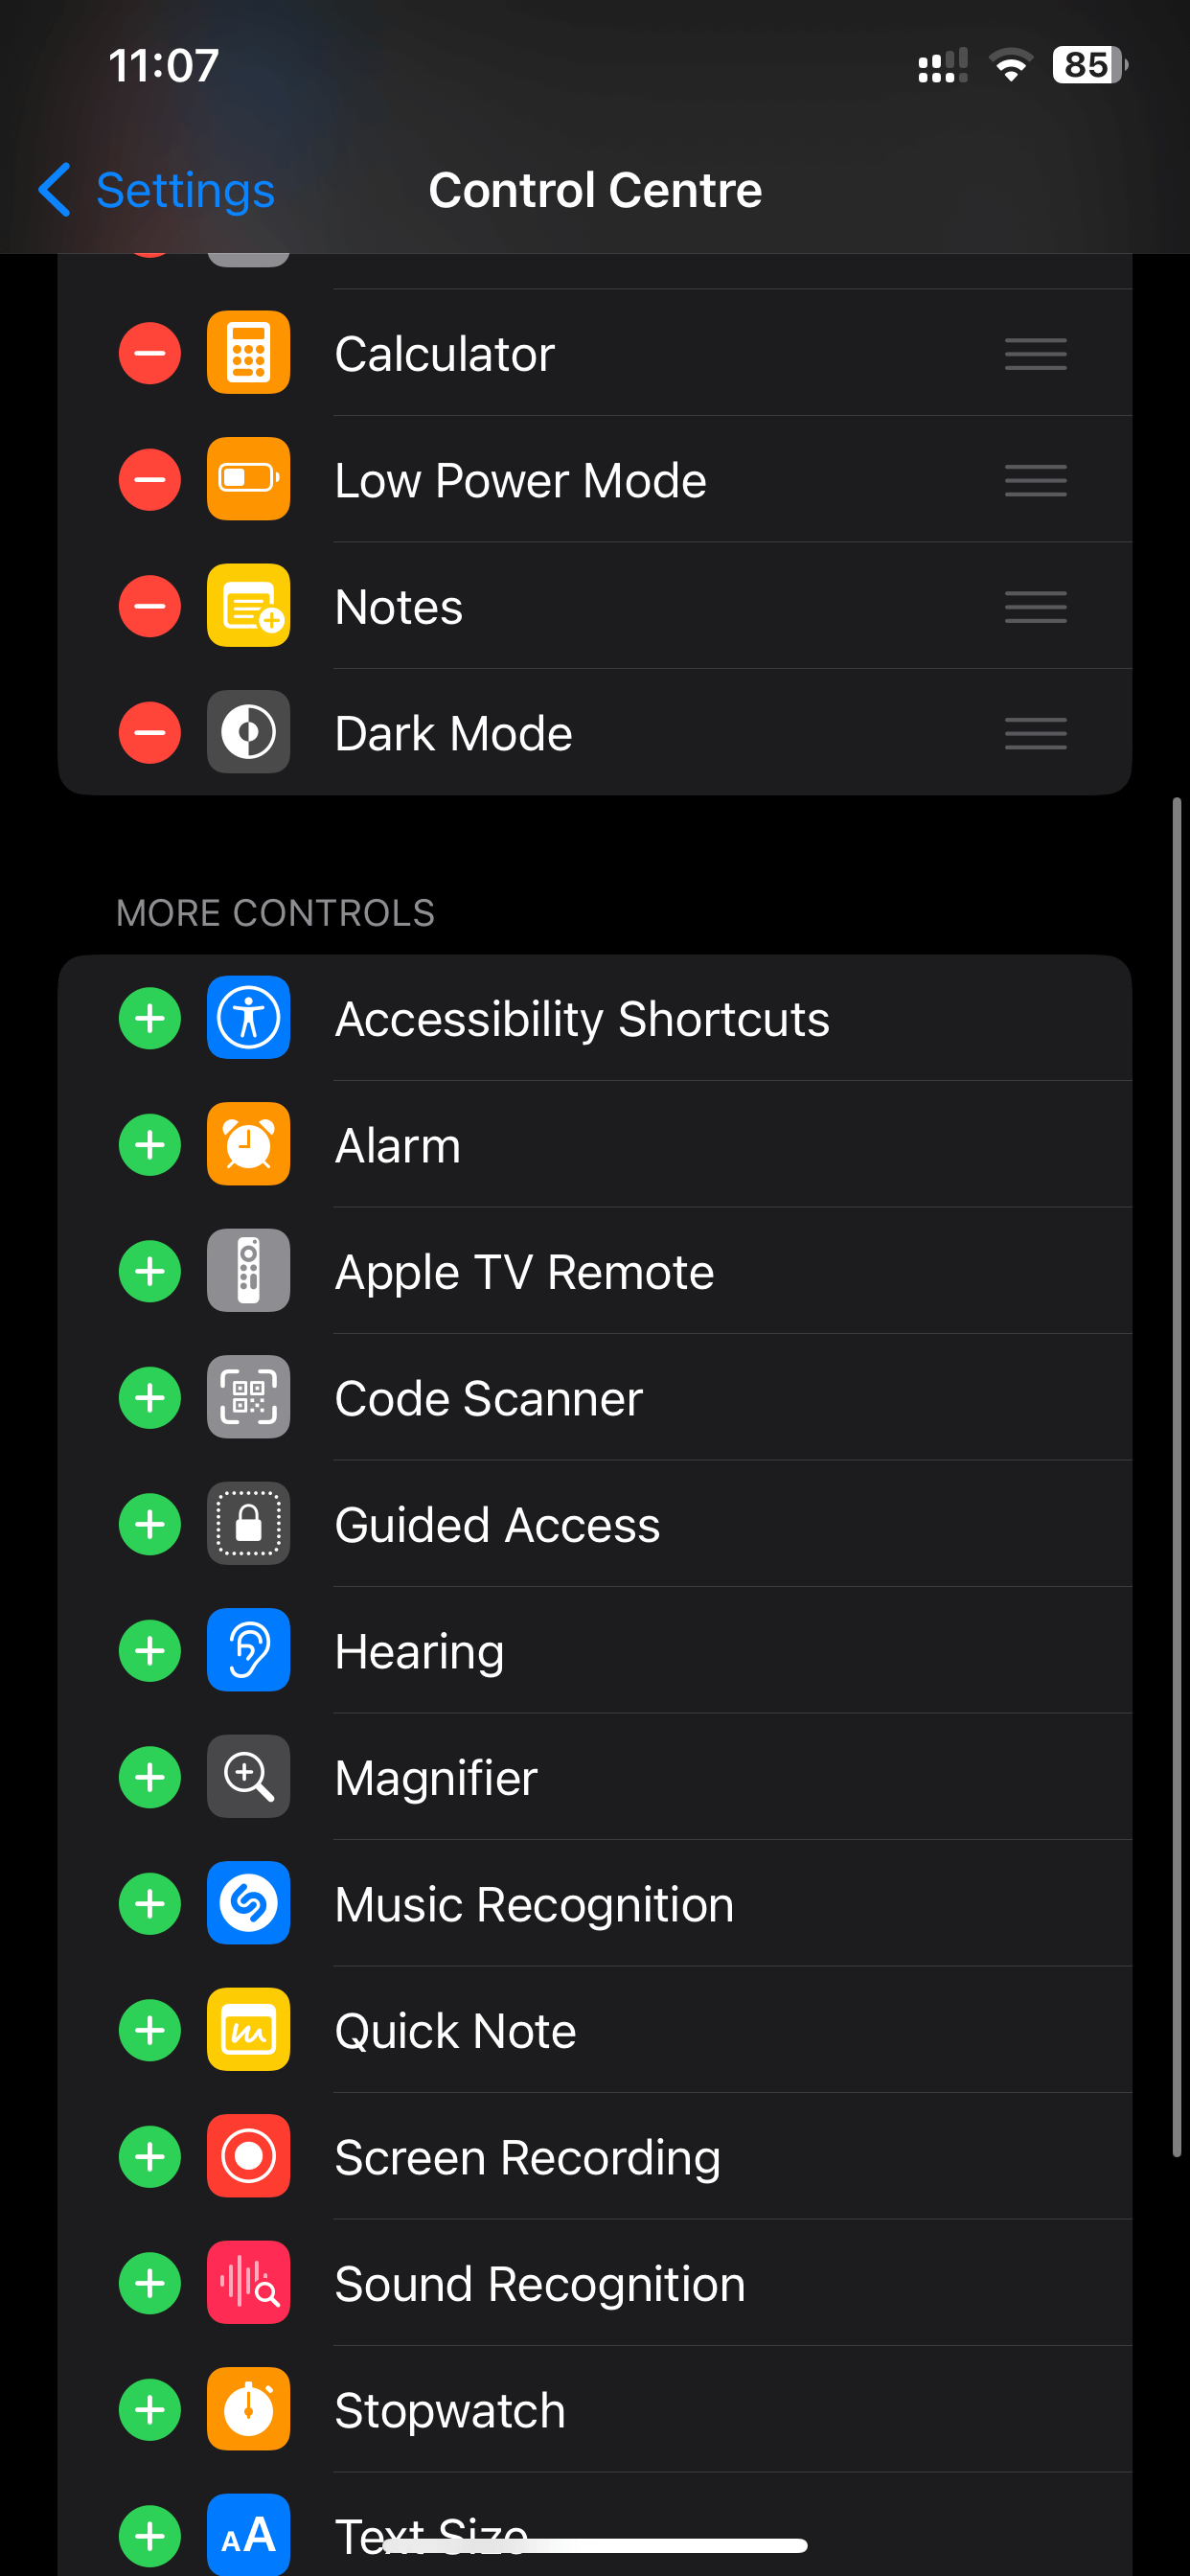
- Scroll down and tap Control Center.
- Tap the + or - icons to the left of each item to enable or disable them.
- You can also rearrange controls using the Reorder button to the right of the control. For this, touch and hold the Reorder button next to the item that you want to move
Now that we know how to customize Control Center, let’s see what hidden features can be enabled in it.
1. Switch Between Wi-Fi Networks
Did you know that you can switch between any of the available Wi-Fi networks directly from your Control Center? That’s right, you don’t have to launch the Settings app and tap the Wi-Fi settings every time you have to switch from one Wi-Fi network to another.
This hidden feature of Control Center is available right in the Wi-Fi control switch. To switch Wi-Fi icons, just tap and hold on the Wi-Fi switch to expand the group, then tap and hold the Wi-Fi icon again to reveal a list of all the Wi-Fi networks that are currently available. Here’s what that looks like.
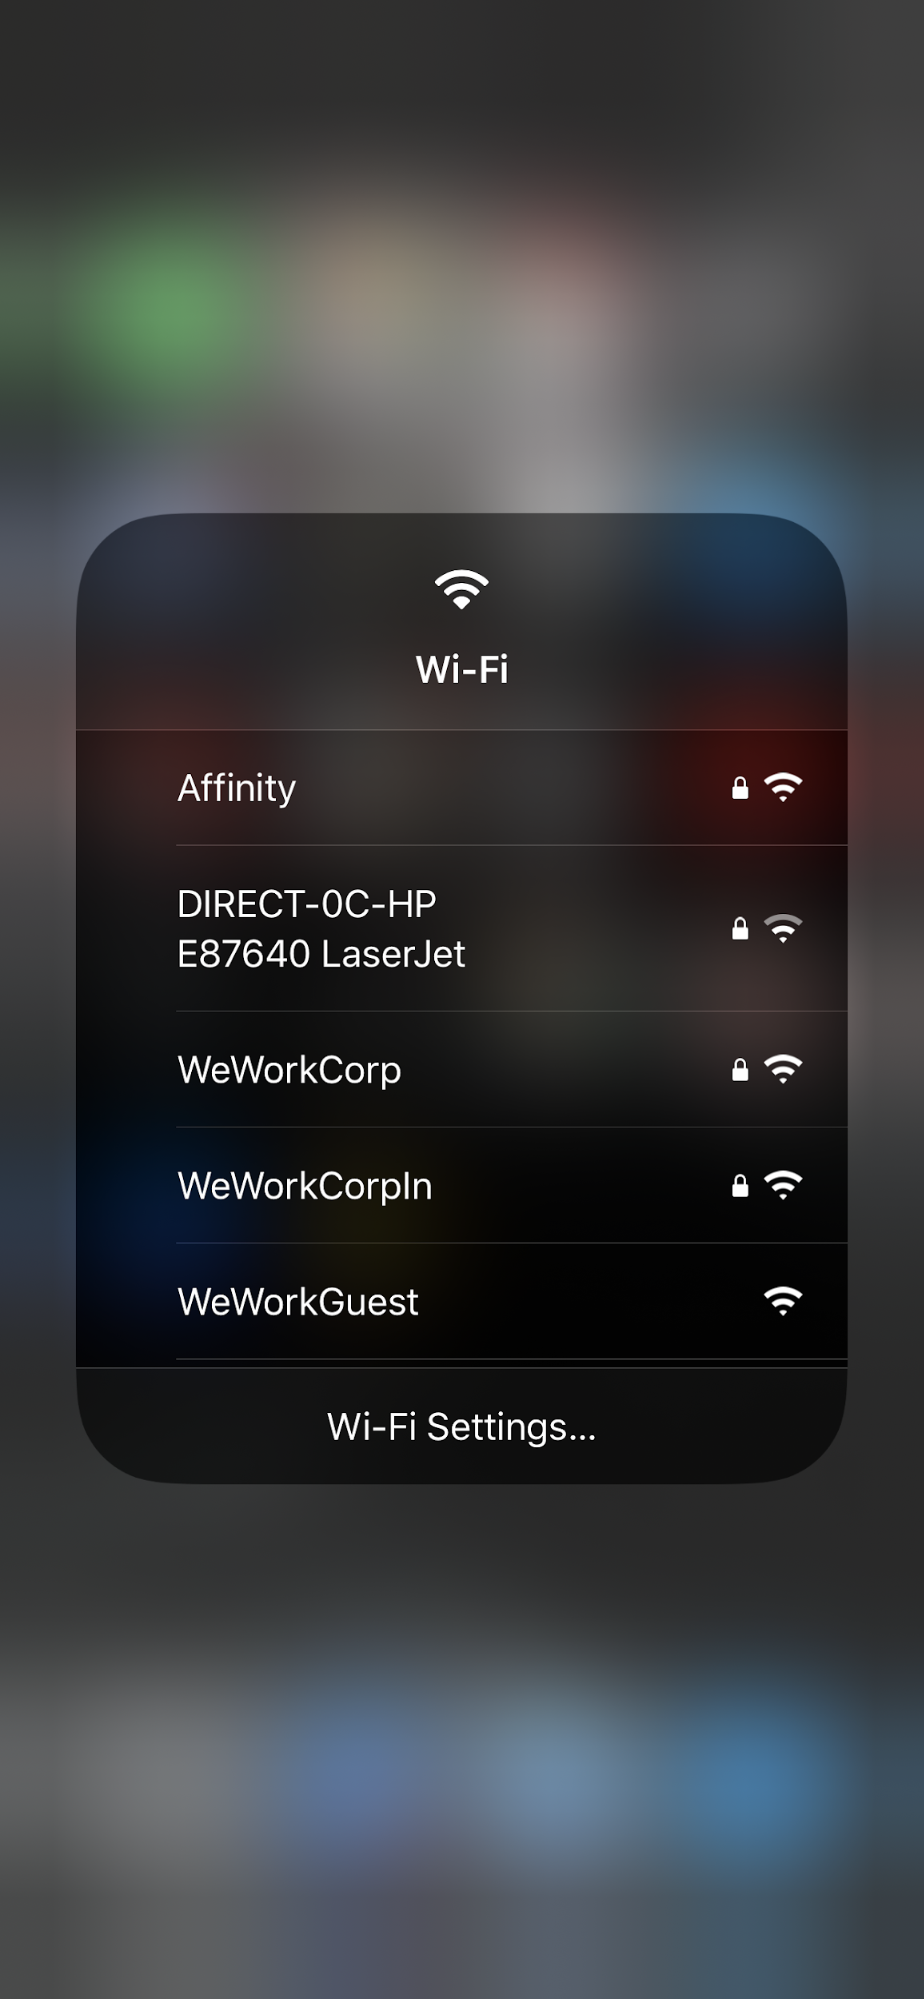
You can also jump directly to the Wi-Fi settings screen from here using the one-tap shortcut at the bottom of the list.
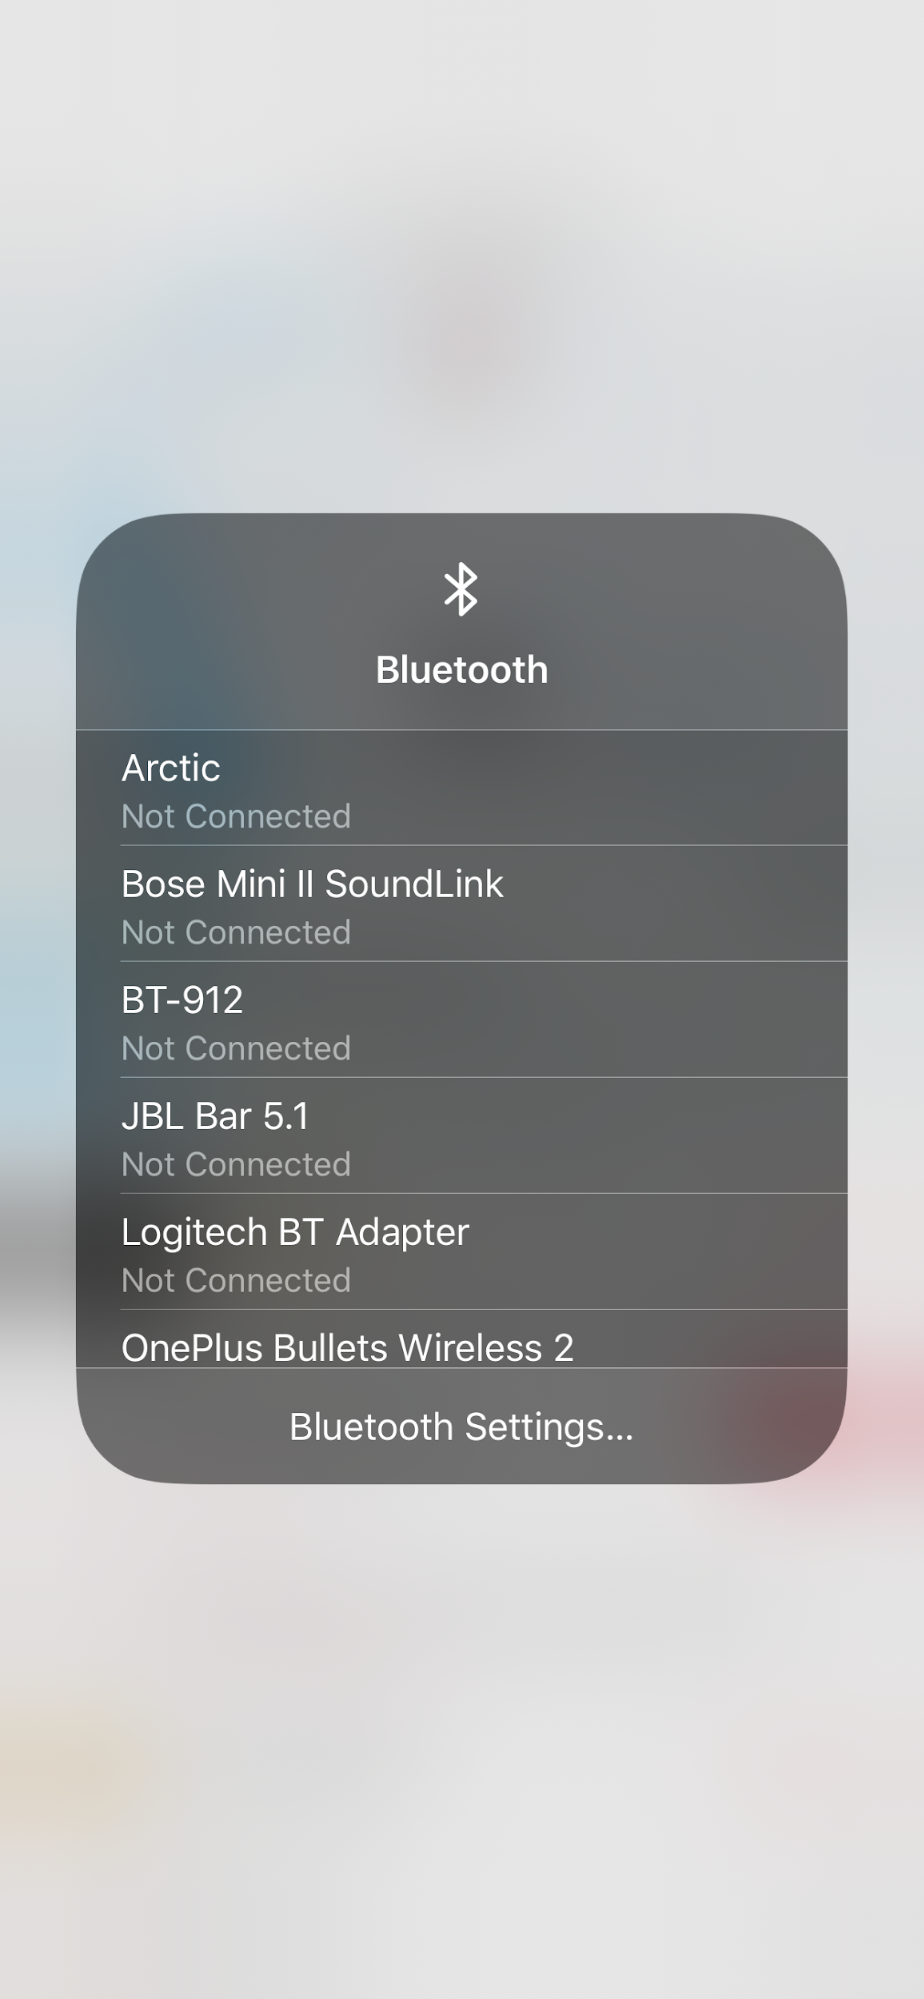
Bonus → You can do the same thing with the Bluetooth icon. It’ll show you the list of Bluetooth devices you’ve saved, and you can easily connect to any of the devices from this screen or jump directly to Bluetooth Settings.
2. Screen Recording
Your iOS device gives you the ability to record what’s happening on your screen. The functionality is built into the operating system, so you don’t have to depend on a third-party app for this.
First, ensure that the Screen Recording control is added to Control Center by heading to the Settings App > Control Center. If you don’t see Screen Recording enabled in the list, tap the green + icon next to it.
Now, you can quickly start recording your screen by invoking Control Center and tapping the Screen Record button. iOS starts counting down from 3, and when the recording is currently active, the clock is displayed with a RED background at the top left of your screen.
Bonus → To stop the recording, you don’t have to pull down on Control Center again. Just tap directly on the clock and confirm, and iOS will automatically save the video file to your Photos app.
3. Location-aware Do Not Disturb schedule
The Do Not Disturb (DND) feature in iOS is a great way to avoid being distracted by unwanted and pesky calls and messages. iOS allows you to create your own schedule for enabling and disabling Do Not Disturb, making this a “set it and forget it” affair. But there are plenty of times during the day when you wish to enable DND on your iPhone or iPad, such as during a visit to the doctor’s clinic, a meeting at the client’s office, or attending the PTA at your child’s school.
Did you know that Control Center quickly allows you to enable Do Not Disturb and auto-disable it when you leave the current location? Simply open Control Center, tap Focus, and tap the three dots next to Do Not Disturb in Control Center, and you’ll be presented with three options to Enable Do Not Disturb:
- For 1 hour
- Until this evening
- Until I leave this location
Once enabled, the DND setting will silence all your notifications (except the ones you’ve specifically allowed in the DND settings) till your iPhone moves outside the geofence of the current location.
4. Control the brightness of the flashlight
Control Center on your iPhone or iPad allows you to quickly toggle the Flashlight ON or OFF with a quick tap of the icon. If you don’t know, here’s how to instantly turn your iPhone into a flashlight.

There are times when you don’t want the full power of the flashlight from your phone, which is where this hidden slider comes in. Just like the other options above, tap and hold the Flashlight icon to reveal a brightness slider. There are four levels of brightness that you can set the Flashlight at, in a single swipe gesture without lifting your finger.
5. Quick Notes
The Quick Notes option in Control Center is one of our favorite options. Using the Quick Notes icon, a single tap lets you automatically open the Notes app and quickly compose a new note. Just tap the icon and start typing to quickly jot down what’s on your mind. Moreover, you can also add another control - Notes to Control Center, and it does a lot more than just composing a note for you. If you press and hold down on the icon, you get three other options to choose from.

Not only can you compose a New Note, but you can also choose from options like New Checklist, New Photo, and Scan Document. All these options open the revamped Apple Notes app for you, but with each option, you have many fewer taps to press. The New Photo option, for example, launches straight with the camera, and the photo you click is saved into a new note in the Notes app. This is a great way to save interesting things like signboards, phone numbers, etc.
What are some of the cool things you like about Control Center? Let us know on Twitter by tweeting out to @Readdle.


