Whether you want to scan black and white documents, produce a grayscale scan of an old photo, or capture a full-color receipt, Scanner Pro gives you complete control over how every scan looks. This guide walks you through every color mode available, how to switch between them, and when to use each one.
What Color Modes does Scanner Pro have?
Scanner Pro has five scan filters that cover every common use case:
Color: captures pages in full colour. Best for forms, brochures, or any document where color carries meaning.
Black & White: converts your scan to pure black and white (also called binary). Text appears sharp and crisp, and the file size is significantly smaller than a color scan.
Photo: optimised for photographs and artwork where rich color reproduction matters.
Grayscale: renders the scan in shades of grey without the stark contrast of B&W Document mode. Ideal for scanning black and white photos or illustrations that contain subtle tonal detail.
Auto Color: scans in the most effective mode depending on the document.
How to change the Color Mode when scanning
Changing the scan filter in Scanner Pro takes just a few taps:
- Open Scanner Pro on your iPhone or iPad.
- Tap the Camera button at the bottom to start a new scan.
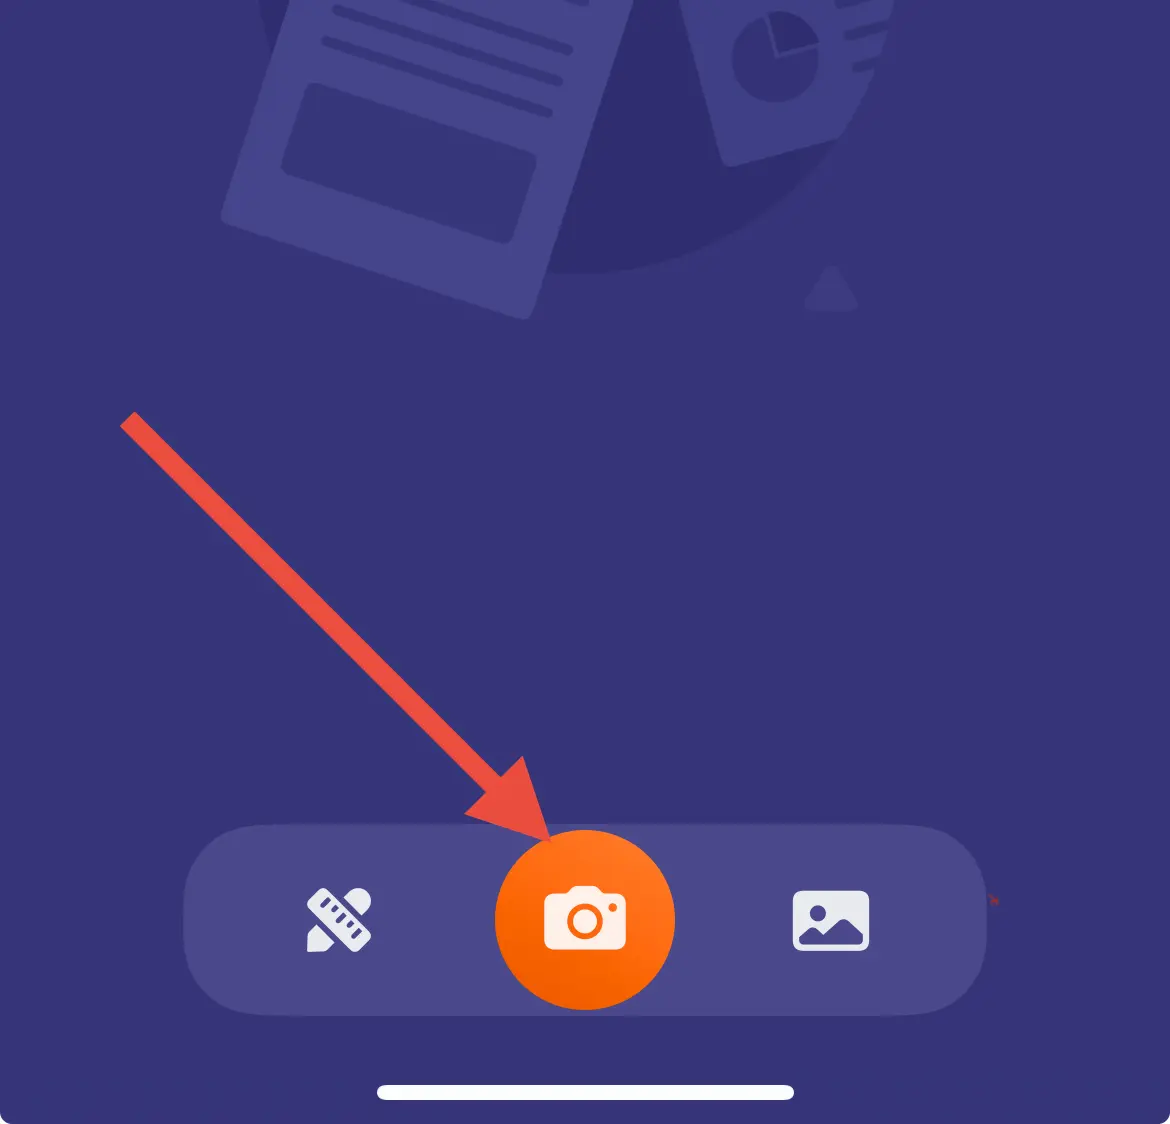
- You’ll see the modes switcher above the Shutter button.
- Select your preferred mode: Auto Color, Color, Black & White, Photo, or Grayscale.
- The preview will update instantly to reflect your chosen filter.
- Continue scanning or save the document.
How to change the Color Mode for an already-taken scan
If you've already scanned a document and want to change its filter to improve the scan quality, you don't need to rescan. Scanner Pro lets you apply a color filter to an existing scan:
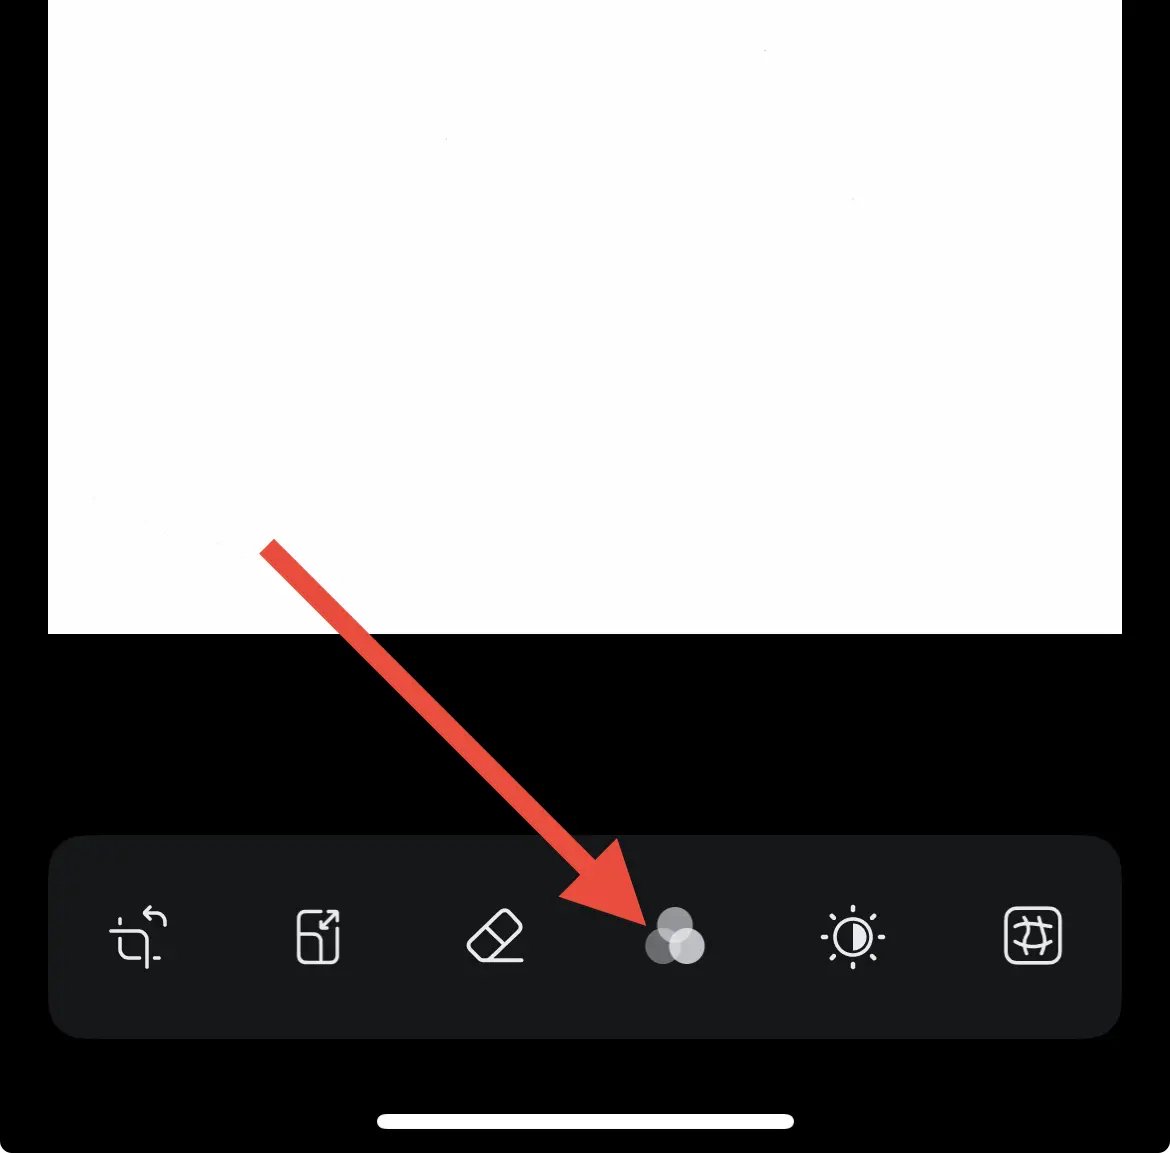
- Open the scanned document in Scanner Pro.
- Tap on the page you want to adjust in case it’s a multi-page scan.
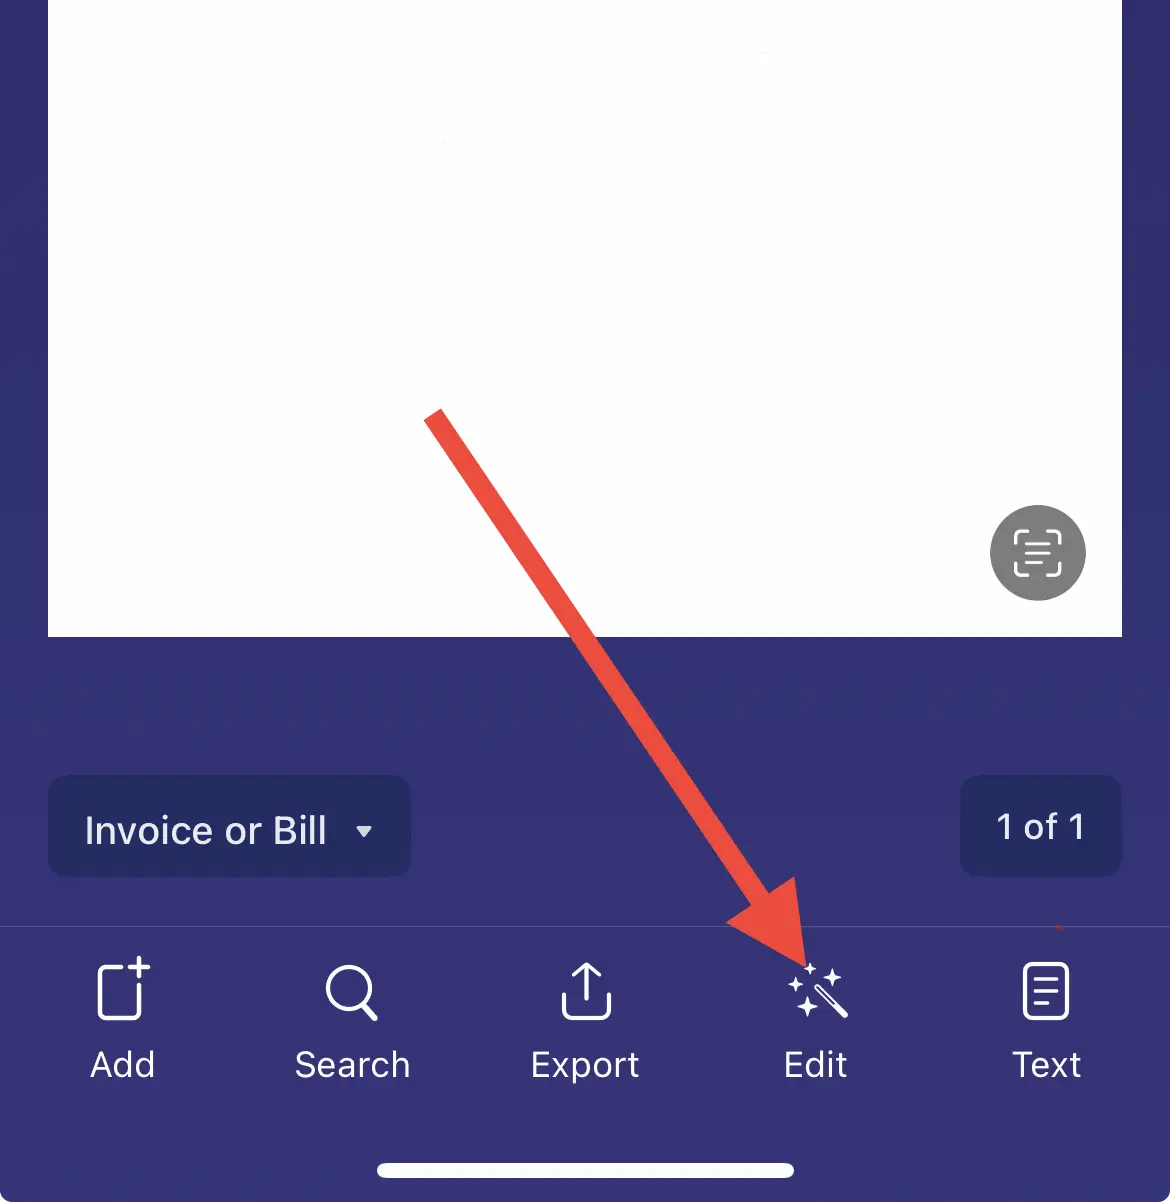
- Tap the Edit button on the toolbar at the bottom to enter the editing mode.
- Tap the three circles button to enter the modes selection.
- Select a new Color Mode from the list.
- Tap Done to apply.
This means you can convert a color scan to grayscale after scanning, or switch from grayscale to Black & White mode, all without pointing your camera at the page again.
When should I use each mode?
- For printed text, contracts, receipts - Black & White Mode
- For color forms, brochures, ID cards - Color Mode
- For old black and white photographs - Grayscale Mode
- For color photos, artwork - Photo Mode
- For hand-drawn sketches with shading - Grayscale Mode
- For archiving documents for small file size - Black & White Mode
How to convert a PDF to black and white using Scanner Pro
If you have an existing color PDF and want to convert it to black and white:
- Open the PDF in Scanner Pro.
- Tap the page you want to change.
- Tap Edit.
- Tap the three circles button and choose Black & White Mode.
- Repeat for each page.
- Export the document as a PDF.
Grayscale vs Black and White: what's the difference?
This is one of the most common points of confusion when scanning. Here's a clear breakdown:
Black and white (B&W mode) produces a strictly two-tone image: every pixel is either fully black or fully white. There are no shades in between. This makes text extremely sharp and legible, and it results in the smallest possible file size. Choose this mode when scanning typed or printed documents, receipts, or contracts.
Grayscale preserves hundreds of shades between black and white. A grayscale scan looks more like a traditional black and white photograph: smooth tonal gradations, no harsh thresholding. This is the right choice when scanning black and white photos, hand-drawn sketches, or documents with fine shading.
Which is better for scanning: grayscale or black and white? It depends entirely on the content. For text-heavy documents, Black & White mode wins: sharper output, smaller file. For photographic or tonal content, Grayscale mode preserves more visual information.
Why does my scan look washed out in Black and White mode?
If your scan looks grey and flat rather than crisp black-on-white, you may be using Grayscale mode instead of Black & White mode. Grayscale preserves midtones, which can make scanned documents appear faded or low-contrast.
Switch to Black & White mode for a sharper, higher-contrast result. If the scan still looks washed out in Black & White mode, check your lighting: shadows and uneven lighting can confuse the thresholding algorithm. Try scanning on a flat, well-lit surface.
FAQ
How do I change scan settings from Black and White to Color?
Open the scan, tap Edit > tap the three circles button, and select Color.
What is the best color mode for scanning?
You can use Auto Color Mode: it will come up with the best settings for your exact document.
How do I set a default color mode in Scanner Pro?
Scanner Pro remembers the last setting you’ve chosen - if you have been scanning in Color mode, you will have it set as a default until you change this.
Does changing color mode reduce file size?
Using Black & White mode can reduce the file size slightly.
Take high-quality scans
Easily turn papers into PDFs with your iPhone and iPad. Scan receipts, books, IDs, invoices.